If you run a SaaS company or have any type of online product, you’ll want to create video tutorials.
Two no-brainer use cases for why you should be making videos:
- Post them on YouTube, tap into video SEO, get new customers.
- Post them in your help documents and onboarding, keep current users, reduce churn.
Now, if you’re doing screen-recording, the default is to use Loom.
Sure, it’s easy. But they look lame, usually ramble, and are not a great user experience to someone outside of your team.
Fortunately – there’s an app that’s just as easy to use as Loom but gives you tons of control for editing a professional-looking video.
The best tool for creating video tutorials is Descript.
In this tutorial, we’ll go over how to use Descript as a one-stop shop for covering all your needs for creating and publishing video tutorials. It is the best step-by-step tutorial maker.
We’ll cover:
- Recording your webcam and screen recordings
- How to easily edit and polish the video
- Create captions and subtitles
- Publish the video directly to YouTube
We’ve covered a lot of uses of Descript on our YouTube channel. If you want a more thorough tutorial to get up and running in 15 minutes, check out this video.
So let’s start with recording the video.
Record the Video: Camera & Screen Recordings
Before we start recording, let’s do a quick outline of how we’d typically structure a tutorial and what the viewer would visually see:
- Introduction / Explanation of what you’re going to learn – Full-screen video of the host talking to the camera
- Demo/Tutorial – Mix of full-screen video, screen recording, and screen recording with video overlay
- Additional Images/Screen Recordings for clarity
- Conclusion/CTA – Full-screen video with text overlay
Now that we have a rough outline of each section we want to record, let’s break down how to do each in Descript.
Descript Video Recording Modes
To record in Descript, open up your project (or create a new one) and go to the Composition you’re going to be working on.
On the top of the nav bar is a Record icon.
If you click it you’ll get three different recording options.:
- Audio only: Just your microphone
- Camera: A connected camera and microphone (video & audio)
- Screen: Your computer screen with the option to add a picture-in-picture video overlay of your webcam, similar to Loom
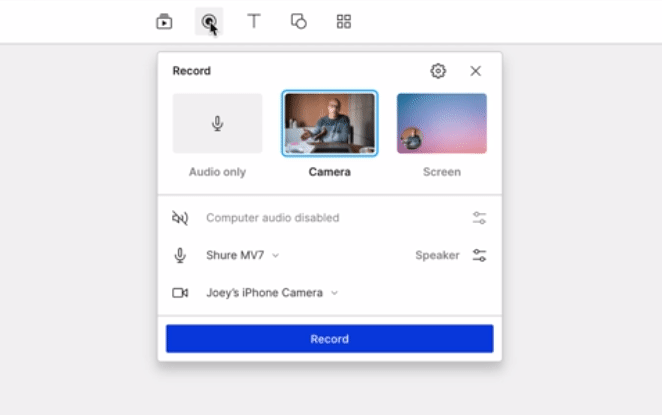
Let’s break down each option here:
- Computer audio – if you want to record any audio that your computer is playing back. Only needed if audio playback is part of the demo or tutorial.
- Microphone – which microphone the recording should use
- Camera – which camera the recording should use
There’s also a Quick Recorder option in the top menu bar on Mac computers, where you can access these recording options without having Descript open.
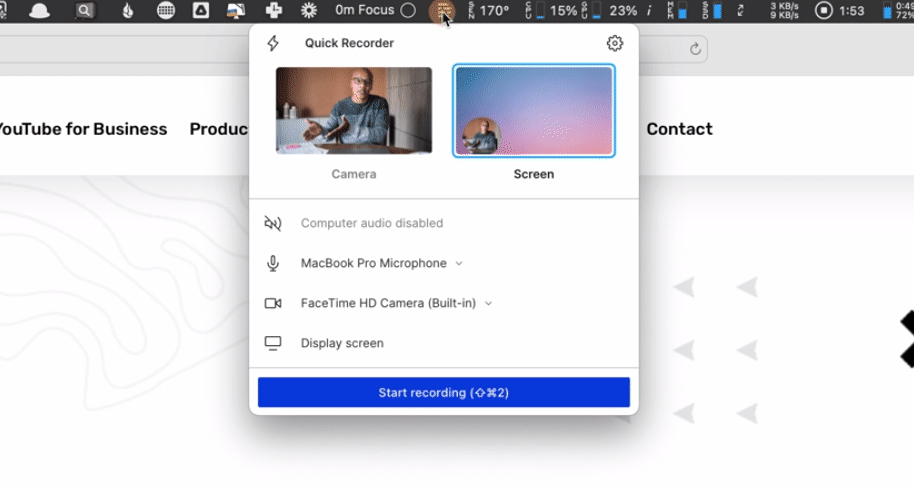
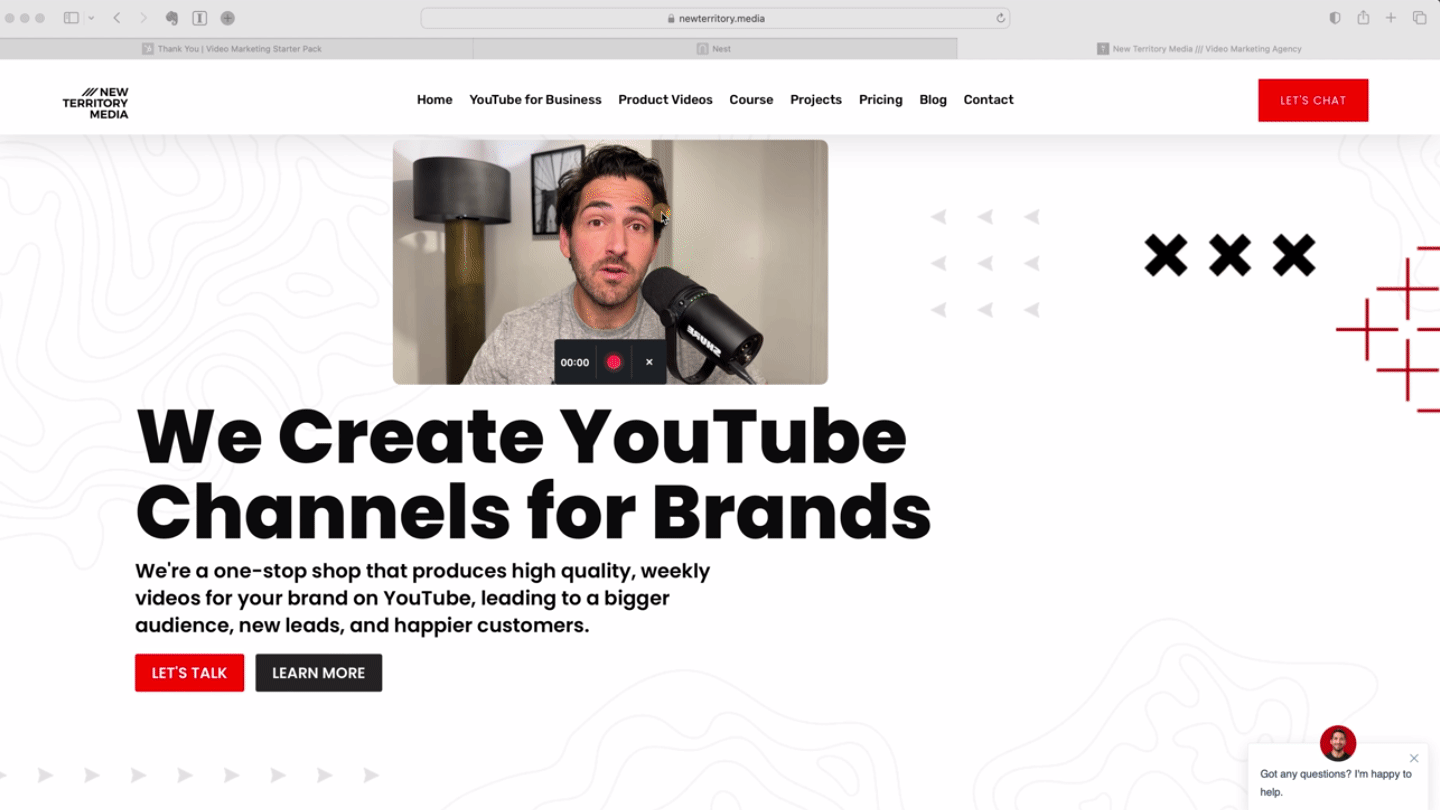
When you choose either the Camera or Screen options, a preview window will appear, allowing you to see your video feed.
This preview window will conveniently stay on top of other windows, ensuring that you can keep an eye on your recording while working with other applications.
Camera mode:
Screen mode:
So now that we know the different recording options, we’re going to run through recording all the pieces we need for our tutorial (don’t worry if you miss something – it’s extremely easy to add new scenes while editing).
As we record, each new video is going to automatically get inserted into the composition we have open and transcribed.
We’ll edit it all in the next step. And if you mess something up or need to do multiple takes don’t worry, it’s super easy to remove it later.
When to use webcam vs screen-recording
Here’s a quick suggested rundown of each setting we’d use to record our outline, based on what we planned out for our video above.
- Introduction: Use the Camera option with your microphone to record a full-screen video of the host introducing what you’ll learn in the tutorial.
- Tutorial: Use Screen to record the tutorial and select your microphone to narrate the audio. You can your computer full-screen or turn on your camera to add a floating video of yourself (you can adjust the size and position of the video overlay).
- If you already have existing demo recordings or other videos that you just want to add narration to, you can use the Audio Only option to just record voice-over.
- Chapter Breaks: To keep the video visually interesting, it’s nice to add chapter breaks where we go back to the host full screen, recapping what we just learned and explaining the next step. This way it’s not just a long, boring screen recording.
- Conclusion: Use the Camera option again to record your outro full screen (you can add text overlays later in Descript).
Quick Tip: You can record the introduction, conclusion, and any possible chapter breaks in one take and split up the clips in the next step when editing.
Editing & Polishing the Video
Now we have all of our raw clips that make up our video – next let’s clean it all up, edit out the bad takes and gaps, add some more visuals and music.
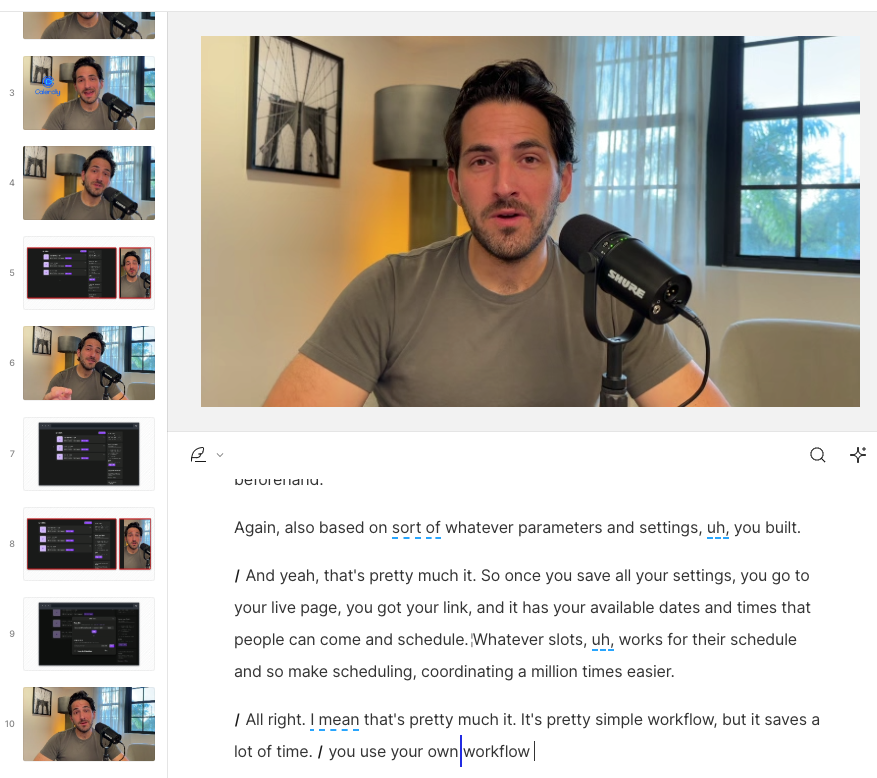
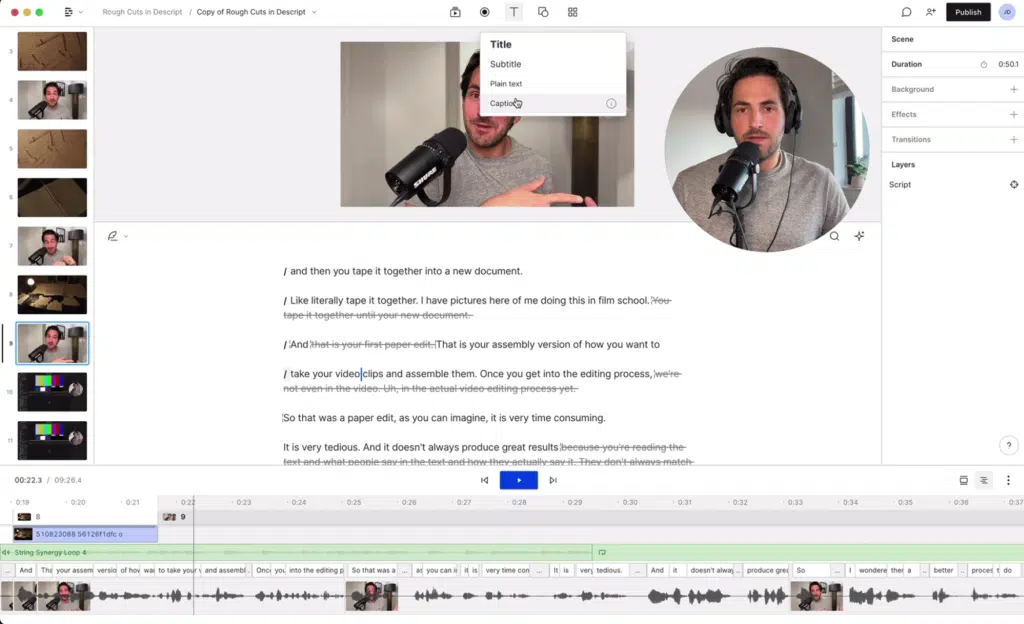
Editing in Descript is like editing a text document.
To remove specific text, simply highlight the portion you want to take out.
From there, you have a couple of options:
- you can press the Delete key to completely remove the text, or you can press CMD+Delete
- use the Strikethrough icon to ‘ignore’ the selected text while keeping it visible on the screen for reference.
In essence, all deleted and ‘ignored’ text will not be included in the video playback.
Also, just like a word document, you can cut and paste text, which moves the video.
So if you recorded your intro and outro in the same video, you can highlight the text in the outro, cut it, then paste it at the end of the document so it’s now at the end of the video.
For more on working with text, including highlighting and searching, check out this video.
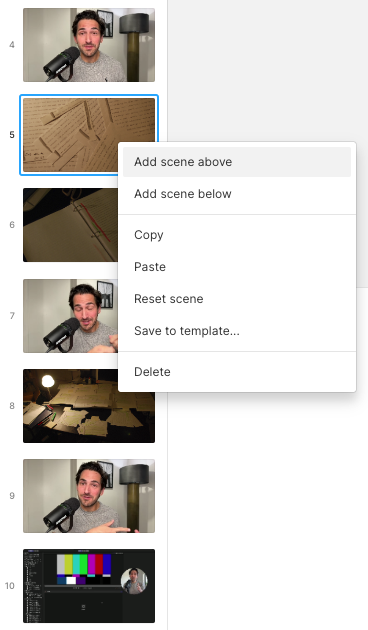
When incorporating visual elements into the timeline, Descript offers an awesome feature called Scenes.
Think of Scenes as slides in a presentation tool.
You can drop in visual elements and it will automatically fill the entire scene, from start to finish, so you don’t need to deal with shifting different video clips around to get the timing right.
Just use the / key in your text to mark a scene.
In a scene, you can add:
- Additional video clips
- Stock video from Descript’s library
- Title cards
- Images
Now that the video is edited, it’s time to add captions to your video.
Creating Dynamic Captions
There are two uses for our video’s transcript:
- Creating captions that appear on screen in the video
- Creating subtitles that get uploaded to YouTube or the video player for accessibility
Before we get started with captions, we need to proofread the transcript and correct any errors.
Editing the Transcript
Now while this looks like a Word document, if you click around and start typing, a bunch of weird stuff’s going to happen because you’re not in Correct mode and actually pressing Descript keyboard shortcuts.
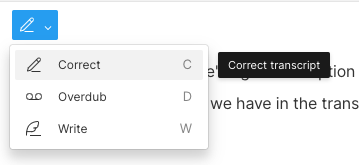
There are basically 3 ways to enter the Correct mode and edit your text in Descript:
- First and easiest would be to highlight the text you need to fix, and select Correct. It pops up the text to fix.
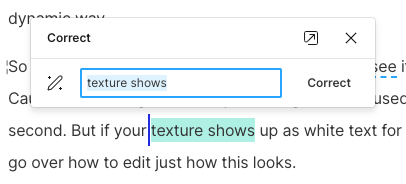
- Second option would be to press the letter C, or if you enter the Correct mode, we see the cursor change. And when you highlight any text, the Correct window automatically pops up and you can instantly make the change.
- The third option would be to treat the text in Descript like a Word document and make quick corrections or edit multiple text. Press the letter C, or go into Correct mode, and then click the Enter correct text mode button. This will open a big blue box labeled You’re in correct mode.
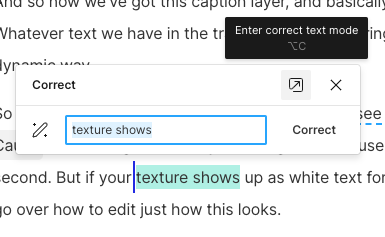
This mode is particularly helpful when you want more freedom to edit multiple sections of text without any restrictions.
For a comprehensive explanation of editing text in Descript, you can refer to this video.
Adding Captions
Before you add captions, figure out what kind of captions are needed depending on where the video will be distributed.
Here’s my take. If the video is going on YouTube, only use captions if the audio is hard to hear or needs clarification. Upload subtitles instead of burning in captions in the entire video.
If the video is going on social media, then dynamic captions (where the active word is highlighted) make sense.
If the video is going on your website and auto-playing on mute, burned-in captions also make sense.
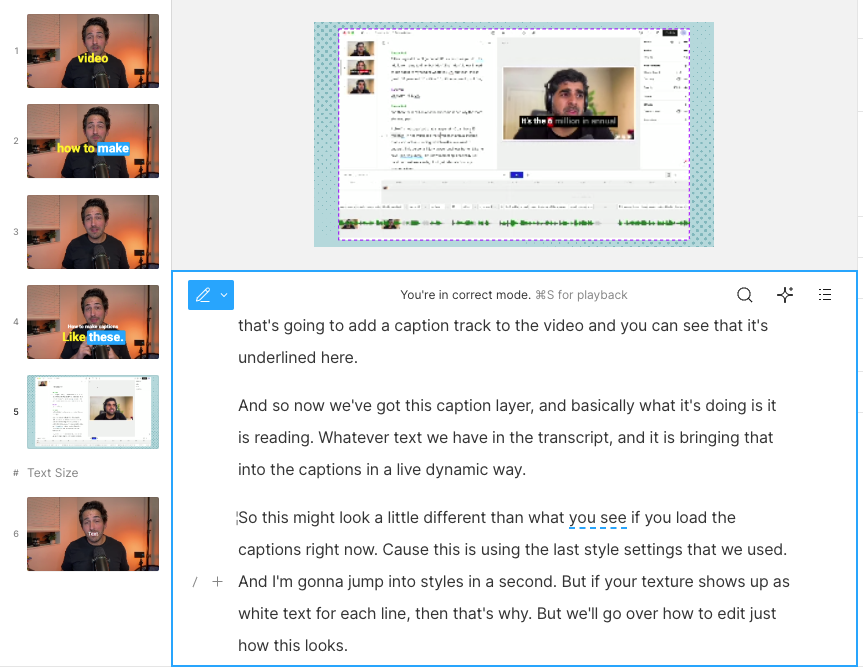
To add captions to your video, simply click on the Text icon and select Captions.
The captions will automatically display the text from your transcript, providing a synchronized visual representation of the script.
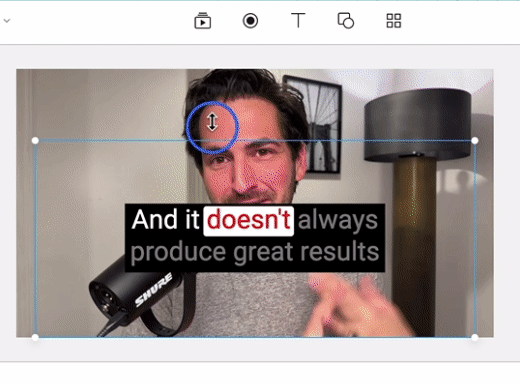
Once you have added captions, it’s time to style them. Descript provides you with customization options to match the overall aesthetic of your video.
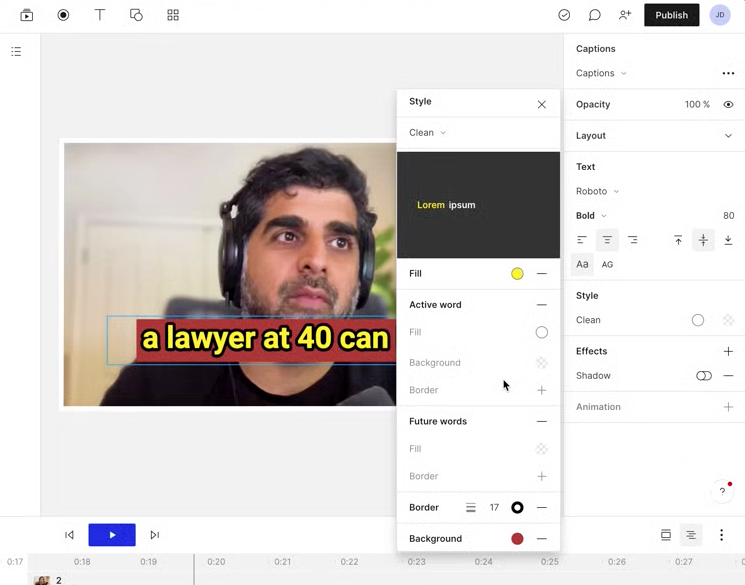
You can easily change the font format, color, and size of the captions, or add a background color to make them easier to read.
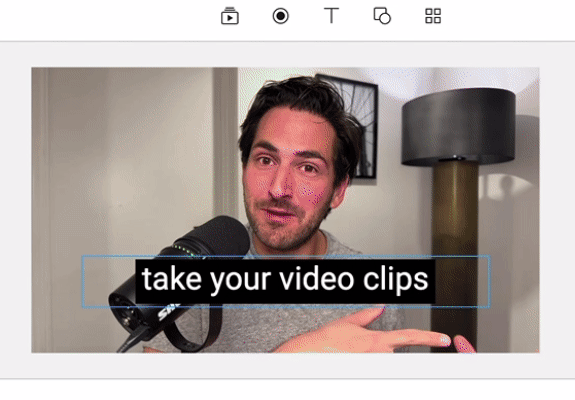
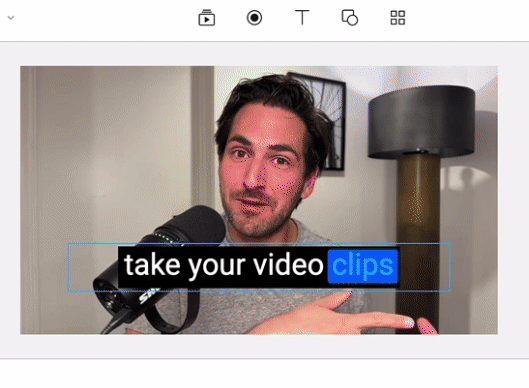
One of the options available in Descript is called the Live Text.
When enabled, Live Text dynamically highlights the currently spoken word, ensuring that viewers can easily follow along with what is being said.
If you prefer to display multiple lines of text on the same frame, you can resize the text box to accommodate more lines, or simply adjust the font size.
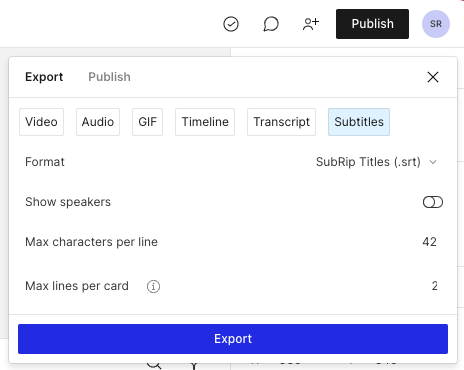
Descript also allows you to generate subtitles (or .SRT file), which can be used on popular video platforms such as YouTube, Vimeo, and others that support caption files.
Once everything’s all set, we can then move forward to publishing your content.
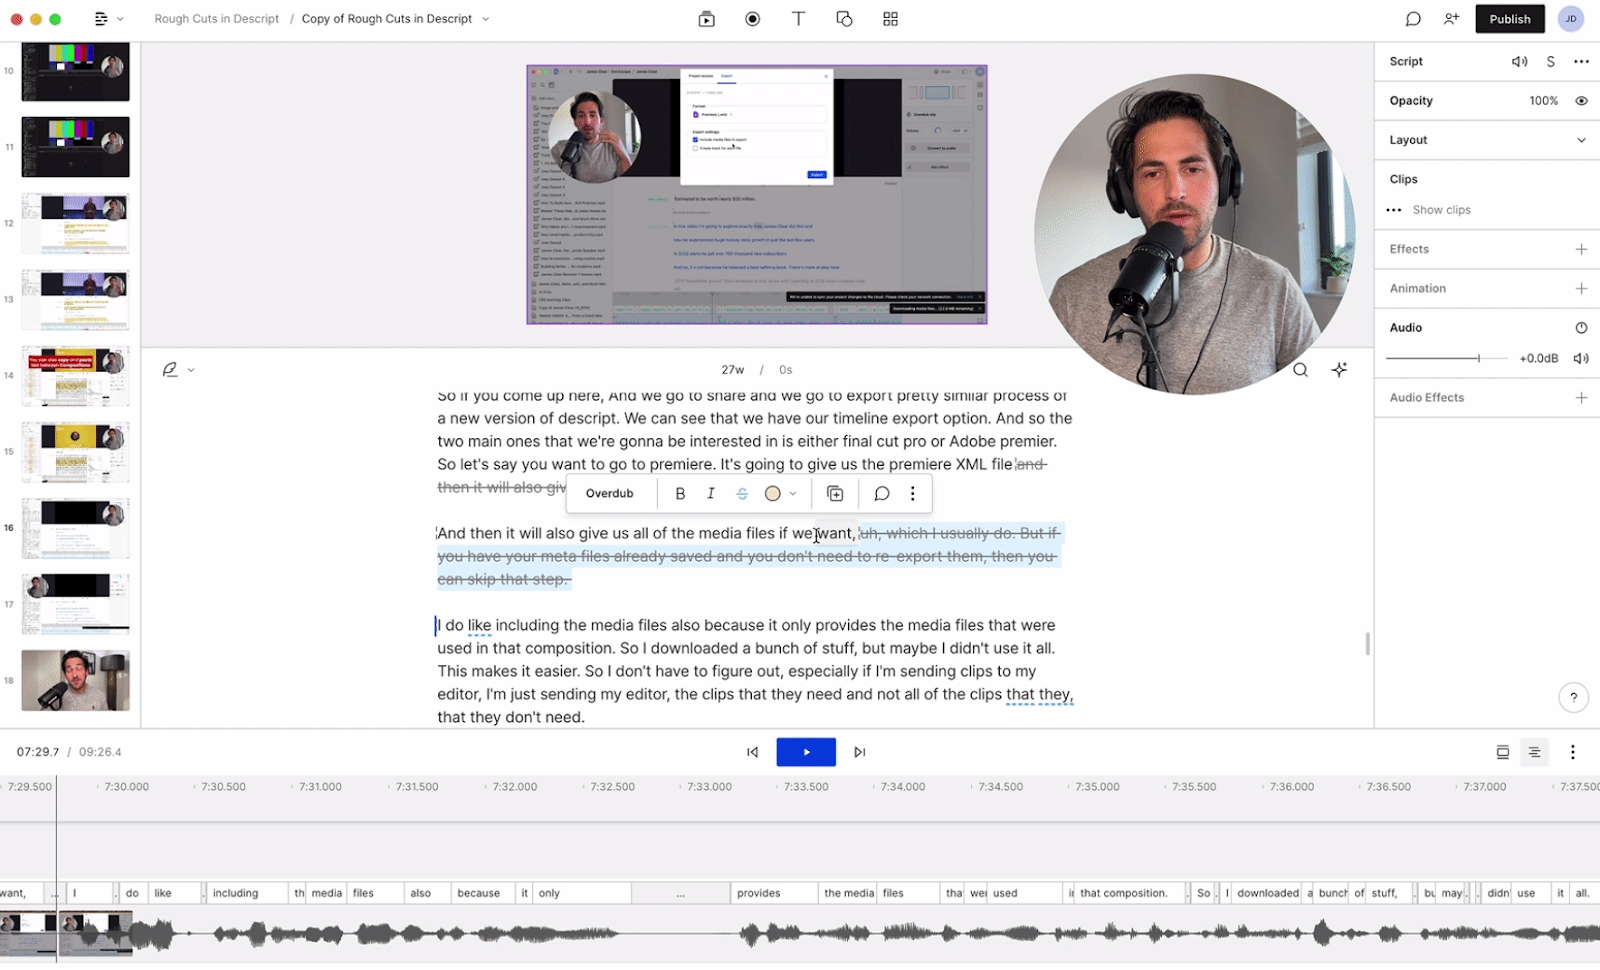
Publish to YouTube
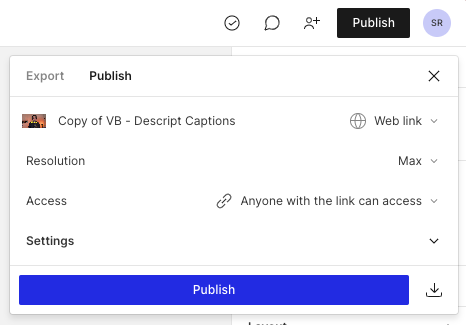
Descript allows direct publishing to YouTube (and many other popular video platforms).
This saves the step of having to download the file and then re-uploading to YouTube.
Click Publish, then select YouTube.
Finalize the YouTube metadata, then sign in to authenticate your account. This will render/upload the video directly to YouTube.
Alternatively, you can export the video file for storage or uploading to any other platform.
Click Publish, then the download arrow next to the blue button (or go to the Export tab for more options).
And that’s it!
One app to make high-quality video tutorials.
We hope you found this tutorial useful. Let us know down below if you have questions or feedback, we’d love to help!