Despite the popularity of DV, filmmakers seem to always be after that elusive film-look. Though HD and Digital Video keep rapidly advancing, film has set the bar high. While the realistic look of DV is more appropriate for some mediums (documentaries, mockumentaries, realism), film adds production value and brings a sense of legitimacy to a movie. Of course the best way to get the film-look is to shoot on film, but DV and HD cameras are obviously more budget-friendly. However, there are techniques/tricks you can do to most any camera to increase your production value (and get that film-look). Here’s a quick overview:
- Depth of Field
- Gain
- 24p Mode
- Production Design
- Lighting
- Depth of Field – This is probably the single best thing you can do to mimic film. In a nutshell, DoF is the range of what is in focus before and after the object you camera is focusing on. That might have been a slightly confusing explanation so go to Wikipedia for all that you’d ever want to know, or read on.

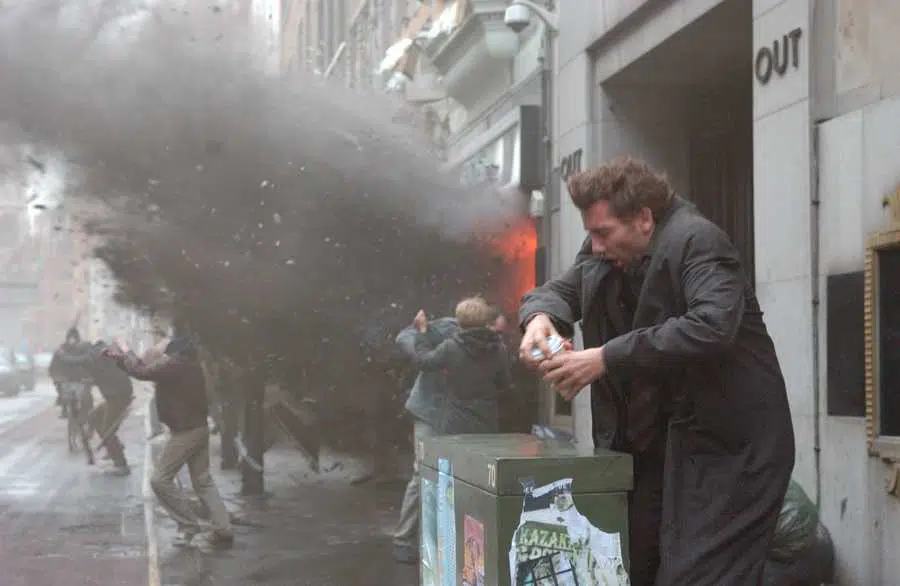
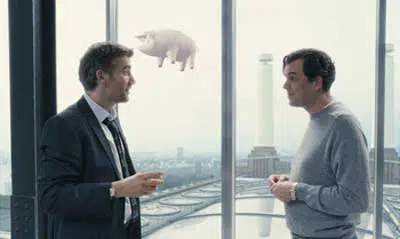
 In the top image, you’ll notice that everything is in focus, while in the bottom only Kee is in focus with the foreground and background blurred. That’s DoF ((The technical term for the blurred circles is bokeh)).DV is notorious for keeping everything in focus. A shallow DoF is great for focusing the audiences attention to where you want it, say a close up of your main actor. If the actor’s background is still in focus it’s a huge distraction for the audience, which is fine if it’s intended but most likely it is not. Unfortunately you can’t really adjust the aperture (or iris) with most consumer cameras and even some pro-sumer cameras to get that nice, shallow DoF. So you have to fake it. You do this by backing your camera up and zooming into your subject, thus giving you a longer lens and an appearance of a shallow DoF.
 - Gain – On most pro-sumer cameras (maybe some consumer ones too) you can adjust the gain. The best thing to relate gain to is film speed (or ISO/ASA). The higher the gain the brighter the image (sometimes necessary if shooting at night with minimal/no light) but also the more grain will be in your image. It’s best to keep the gain around -3/0.
- 24p Mode – Similar to gain, a lot of pro-sumer cameras come with an option to record in 24fps ((Frames per second)), which is the speed that film records ((Video/DV records at 30 fps)). If you’re going for the film look it’s probably best to keep this on.
- Production Design – Avoid White Walls – Nothing says boring more than talking heads in front of plain white walls. Add some depth to your image with different lighting layers – foreground, midground, and background.

- Lighting – There’s a lot to go into with lighting, but here are a few tricks concerning getting a better, more film-like image:
- Keep lighting continuity. Know which direction your light source is coming from and try to match that shot to shot. If a bright spot from the sun (or light you set up to mimic the sun) is hitting an actress’ shoulder, make sure it’s there and on the same side in the reverse shot.
- Soften lights. Diffuse your source. Some cheap light sources are work lamps from a hardware store. These are great but they are too harsh. They need to be diffused. In film the main way to do this is with diffusion paper and scrims, which are basically nets of varying tightness. But you don’t have to spend a lot of money to get the “official” supplies, use whatever you can find: wax paper, netting for screen doors, paper lanterns, stockings — anything that will soften your light.
One of the advantages with DV is what you see in the viewfinder is pretty much the image you’re going to get. The best thing to do is to test different techniques out before you start shooting. Get a room, some lights, a person or two, and light a scene. Mess around with your camera’s settings. Experiment while you have all the time in the world.
Hope these tips add some production value to your movies.


