I was speaking at SMX West, a search marketing conference, when I got a question from someone who owned a YouTube channel with over a thousand unoptimized videos. What was the best way to start optimizing them for SEO without going crazy manually going into each and every one of those videos?
You might be in a similar boat. You’ve just discovered the power of video SEO and are feeling overwhelmed by the enormous amount of videos you need to update, even if it’s just a couple dozen. Where do you even start? Here’s a quick guide to help you.
In the first livestreamed episode of our new series Video Marketing Minute, I cover in detail all the steps you need to take to identify the videos to optimize first and what tools to use to make batch edits.
Watch the episode below or read on for an interactive transcript.
Step #1: Identify your top-performing YouTube videos
When you have an overwhelming amount of videos to sort through, it’s good to keep Pareto’s Principle in mind: “80 percent of results come from 20 percent of your efforts.” Chances are if you look at your channel, a very small number of your videos are bringing the most revenue and results for you. You want to focus on optimizing those first.
To get started, you’ll want to dig into your channel analytics and figure out what your top videos are.
Metrics to look at when deciding your ‘top videos’
- Views
The obvious metric. More views mean more popular video. But are people sticking around to watch your entire video after the first click? - Watch Time
Usually videos with higher views will have a higher watch time. However, if that’s not the case, this could be an early indicator that people aren’t sticking around to watch your video. - Average percentage viewed
This is the most important metric we’ll look at. If people are watching most of your video it means the content is very engaging.
YouTube doesn’t just look at the number of views, it also looks at how much of your video people watch. The ‘stickier’ the content, the more likely YouTube is going to recommend your video to viewers. Think of it like the bounce rate of your video (it’s also a good reason why it’s important to focus on editing).
How to look at these metrics on YouTube Studio
First of all, go into YouTube Studio, select ‘Analytics’ and go into ‘Advanced Mode’ in the upper right corner.
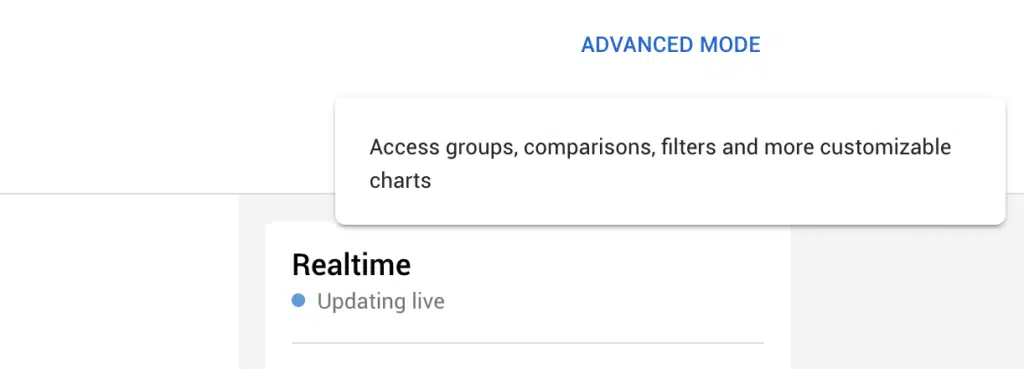
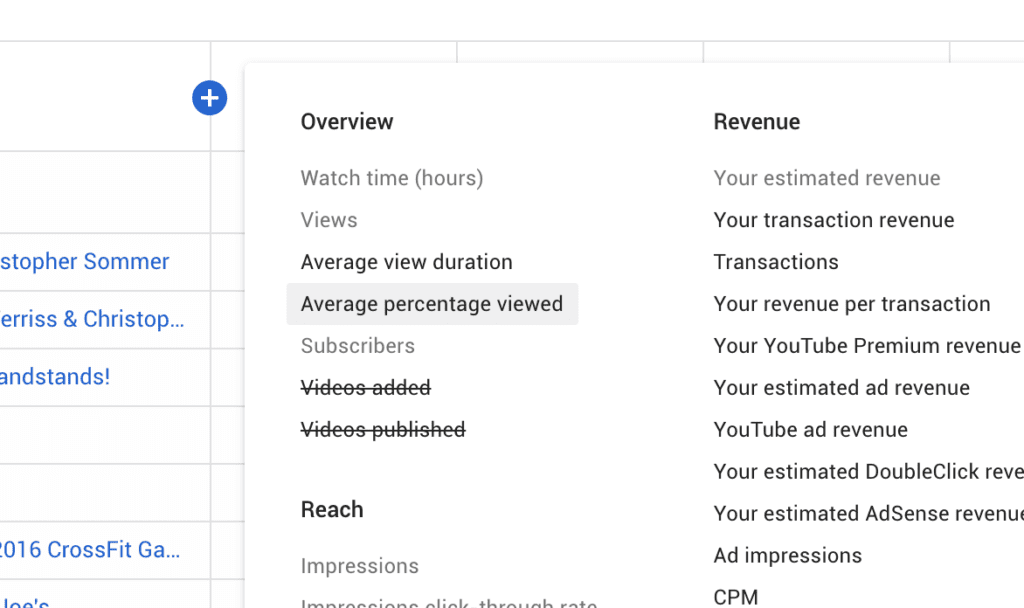
From here, we’ll add an extra column for ‘Average percentage viewed’
Now you should be able to sort the videos in ascending or descending order by clicking the metric columns at the top.
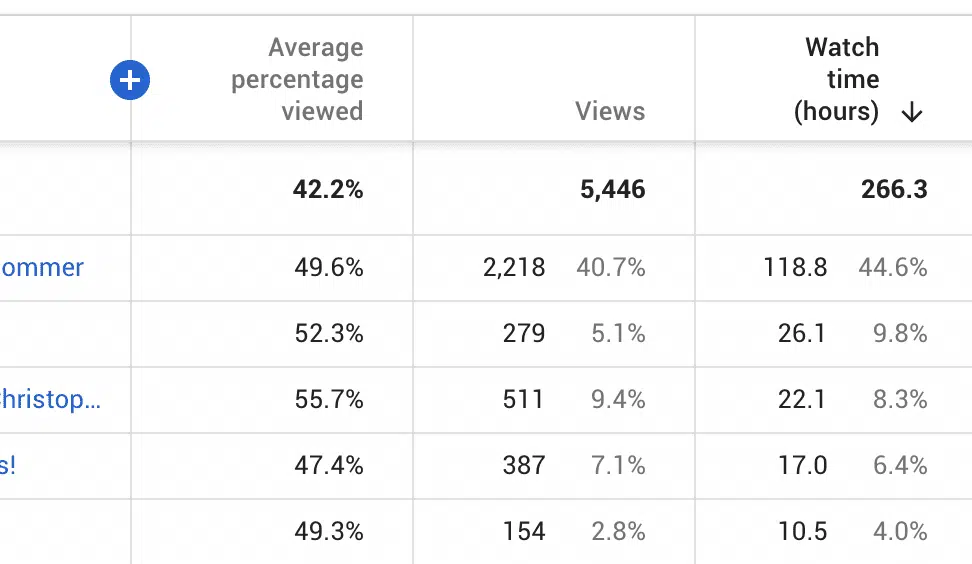
Exporting the data for deeper analysis
There may be times where YouTube Studio doesn’t have all the filtering or sorting functionality that you need. The ‘Average percentage viewed’ metric, for instance, sometimes can’t be sorted. In cases like this, I highly advise getting out of YouTube Analytics and onto a spreadsheet.
To export your data, you can click the arrow key on the top right to download the data either as a .csv or import it into Google Sheets, whatever your tool of choice is.
Once you spit this data out, you can start sorting your videos by most watched or most percentage completed, ranks them by performance. This should give you a better picture of which videos to focus on. You can work your way down and split up the work into batches—whether you want to do a dozen a month, or 50 a month, or 100 a month.
Work backwards optimizing the rest and in some cases, you might discover some videos are not worth optimizing: maybe the way they’re made or just the reason that they exist in the first place is not relevant. It’s okay to not optimize every single thing on your channel, so don’t worry too much about it
Step #2: Download a YouTube bulk-updating tool
When it comes to actually making bulk edits, there are two main tools to do that:
These are the two main YouTube channel optimizers and third-party plugins have bulk updating features. While both are exceptional tools and similar features, TubeBuddy definitely gives you more control and offers more options when it comes to bulk edits.
Step #3: Start Optimizing Your Video SEO!
Using VidIQ
Once you have VidIQ installed, you can go to the Videos tab in the YouTube Studio. If you look at the top, you’ll see a VidIQ icon which gives you some options to mass edit your videos.
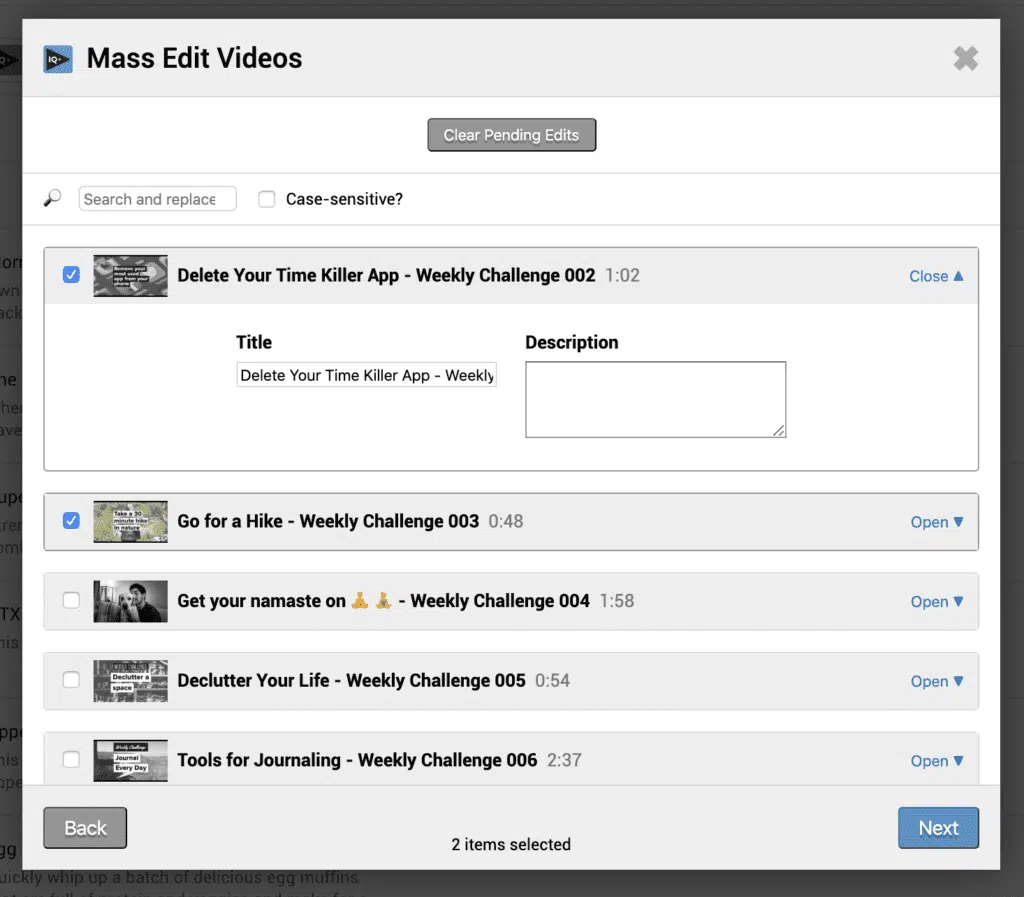
Using TubeBuddy
TubeBuddy functions similarly to VidIQ in that it also provides tools on the Videos tab itself. But in addition to editing the metadata, it also allows you to bulk edit Card and End Screens—which I highly recommend if you are optimizing for SEO (VidIQ also lets you bulk update cards and end screens, which I didn’t note in the video. But TubeBuddy gives you more options.).

The ‘Bulk Find / Replace / Append’ tool
Looking at the “Bulk Find / Replace / Append” tool, you’ll see that you have all sorts of controls for whether you want to enter the text before or enter the text after something or completely replace your description.
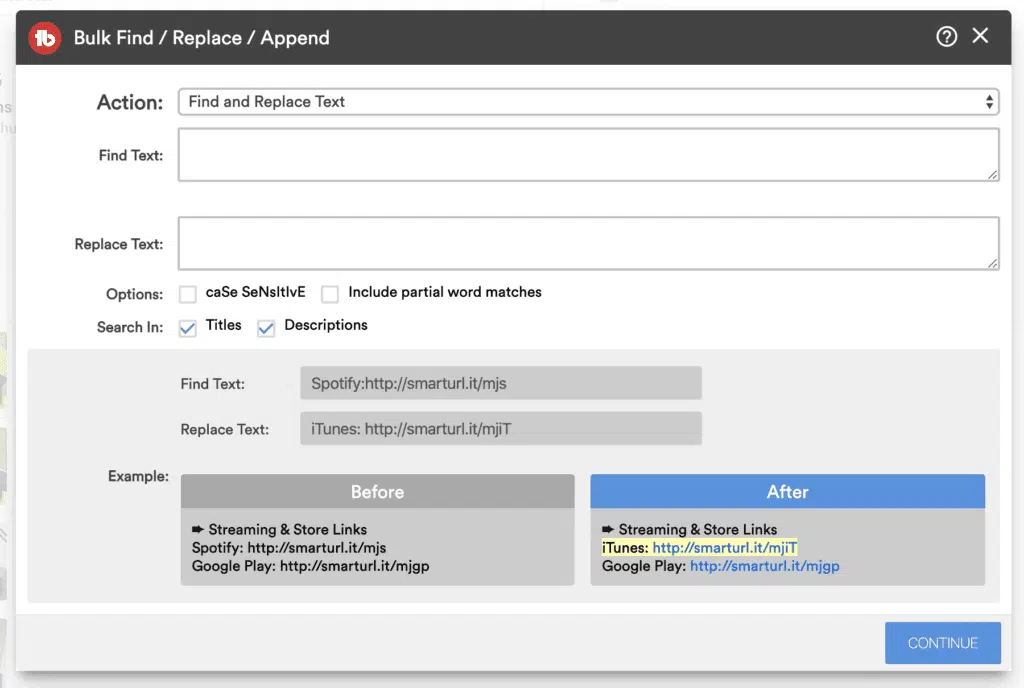
So this works really well if you can broadly categorize your videos under certain themes or there’s a collective group of hashtags, descriptions or paragraphs that you think would work well across a broad range of videos. You could select your criteria and update them in one go.
Bulk Editing by Playlist
If your videos have a common theme or if you want to separate them into common topics, you could add the videos you want to focus on first to their own playlist. If you go to your playlists with the TubeBuddy plugin installed, you’ll be able to batch edit all the videos within a specific playlist.

When I say batch edit here, it’s a little bit of a generous term. Basically, TubeBuddy will load up the videos in their toolbar and allow you to navigate easily between videos within the specific playlist. (Not noted in the video is you can also sort videos to bulk update by playlist with VidIQ).
I hope you found this guide useful. If you have any questions, comments or thoughts about Youtube optimization, leave a comment below.
Subscribe to our channel to watch more videos like this and get updated when we go live each Wednesday.

