Making YouTube videos for your business can be tedious. The job is definitely easier when you use the right equipment, including video editing software such as Adobe Premiere Pro. Premiere makes it easy to fine-tune every part of the video to perfection. After you’ve edited, though, you still have the work of exporting ahead of you- and it can get pretty technical.
This guide to export settings for Premiere Pro will teach you everything you need to know about taking your videos out of the editing software and getting them onto YouTube with the best quality!
What are the Best Premiere Pro Export Settings for YouTube?
We’ll get into the nitty-gritty of export settings further down. If you already know a decent bit about exporting video with Premiere, you can use this table as a reference. The best export settings for 720P, 1080P HD, and 4K video are as follows:
| Setting | 720p Video | 1080p HD Video | 4K UHD Video |
|---|---|---|---|
| Format | MP4 | MP4 | MP4 |
| Codec | H.264 | H.264 | H.264 |
| Frame Size | 1280 x 720 | 1920 x 1080 | 3840 x 2160 |
| Frame Rate | As shot | As shot | As shot |
| Target Bitrate | 5 | 8 | 45 |
| Bitrate Encoding | CBR | CBR | CBR |
Premiere Export Settings: Basics and Key Terms
Now, it’s time to dive into all the different export settings within Premiere Pro. If you have a grasp of what each setting option means and how it can change the video’s quality on YouTube, you’ll never have to guess your way through settings in Premiere again.
The Importance of Using Proper Export Settings
There are two things to keep in mind when selecting your export settings. The first is the properties of the video that you shot- frame rates, resolution, etc. Matching the export settings to these properties will ensure things look as they should when you export.
The second are the settings that YouTube recommends. Sticking with these settings will make help deliver your video in its best quality without huge file sizes.
What Happens if I Get It Wrong?
The good news is that the ramifications of using the wrong export settings in Premiere are pretty small. You will still want to export again with proper export settings; all we’re saying is that you don’t need to panic if you accidentally used the wrong settings!
Here are some of the things that can happen if you use the wrong export settings:
- The video file size will be too large and take forever to render/export, and even longer to upload to YouTube.
- YouTube will overly compress the video to reduce the file size, resulting in a lower video quality.
- The video will look “choppy” or blurry because the frame rate is incorrect.
- Premiere can crash if your computer does not have enough RAM or system resources
- In rare cases, YouTube will not accept the video if the file type or codec used isn’t supported.
Again, none of these things will cause a complete disaster, and the easiest fix is simply re-exporting the video with different settings. However, using the best export settings the first time lets you export from Premiere and upload to YouTube without the headache!
Formats and Codecs
When you export the video from Premiere, you will need to choose a file format and a codec. These are two interlinked settings that guide Premiere Pro as it exports your video. For YouTube, the recommend file format is MP4. It’s efficient and high-quality, letting you upload quickly without losing any resolution.
Codecs are a bit more complex; they describe the way Premiere Pro will compress and decompress the video file. The more efficient the codec, the higher the video quality after export (without creating massive file sizes). The best codec for YouTube is H.264. It efficiently encodes and compresses the video into the MP4 video file. YouTube recommends that every video uses H.264 encoding, though it still accepts other types.
Frame Rates
The frame rate of your exported video is mainly dependent upon the frame rate used when you recorded it. The camera gear you used (check out our recommendations here) will let you select a frame rate; that frame rate is the one you should use when exporting. Here are some of the most common frame rates:
- 24 FPS: in Premiere Pro and other programs, you’ll see it listed as “23.976”, but it’s much easier to simply say 24. This is typically known as the ‘cinematic’ frame rate.
- 25 FPS: 25 fps is rare in North America. It’s typically only used in Europe.
- 30 FPS: 30 fps (or technically 29.97) is traditionally used in TV and brodcast.
- 60 FPS: 60 fps is more commonly used with esports and video games but is gaining use in regular video recordings. The higher frame rate will produce much smoother motion and a ‘hyper-realistic’ look.
Bitrate
Bitrate describes how much information (measured in bytes or kilobytes) is transferred in every second of video. The higher the bitrate, the more data transfer, and the higher the overall quality.
“Bitrate Encoding” is a setting that determines if the bitrate will remain constant or adjust to complex segments of the video. CBR (constant bitrate) is ideal, as it keeps the video quality constant and requires less work for Premiere Pro as it exports.
The only caveat in bitrate settings is that raising the bitrate too high increases the file size and can be too demanding for people’s internet connections. The last thing you want is to upload a video that buffers incessantly!
The best bitrate setting (the “Target Bitrate” in Premiere Pro) is usually 8-45 Mbps. This will ensure that your video is of the highest quality without going overboard. For 720P and 1080P videos, stick with 8-12; 4K videos with higher frame rates work better with a target bitrate of 35-45.
Picture Resolution
Most people have a decent working knowledge of picture resolutions so we’ll take a look at this from a YouTube-specific angle. Picture resolution describes the number of pixels used to display the video; the higher the number of pixels, the clearer and sharper the picture.
Your audience (with few exceptions) will be watching the video in one of three ways: either on their mobile phones, their computers, or increasingly on their TV. Your audience’s viewing habits can help inform which picture resolution is best for your brand’s YouTube videos.
- 720P: This resolution, which was the standard for HD video before 1080P was adopted, looks excellent on phones but not on laptops or TVs. If your audience is heavily on mobile, you can cut file sizes and upload times by shooting and exporting in 720P.
- 1080P: This is the standard for almost any video broadcast, whether it be YouTube, TV, or streaming apps. This resolution should be your default.
- 4K: Also called “UHD” or “Ultra-HD.” It’s great for brands that are heavy on visuals but usually unnecessary otherwise. If your audience is watching on their phones, 4K will be overkill because there are no phones with 4K screens. Most phone screens can replicate a “UHD” experience, but the actual number of pixels in the screen is far lower than 4K.
What is Encoding?
Encoding describes the process by which Premiere Pro will take your edited video files, compress, and convert them to meet the standards you have laid out in your export settings. The important thing to remember about video encoding is that it can be a very complex task for Premiere (and your computer) to execute.
That means you should do everything you can to make your export settings match those of the settings you shot the video in: resolution, frame rate, etc. Doing so ensures that Premiere will have less work to do as it encodes and exports the video, saving you time and avoiding crashes.
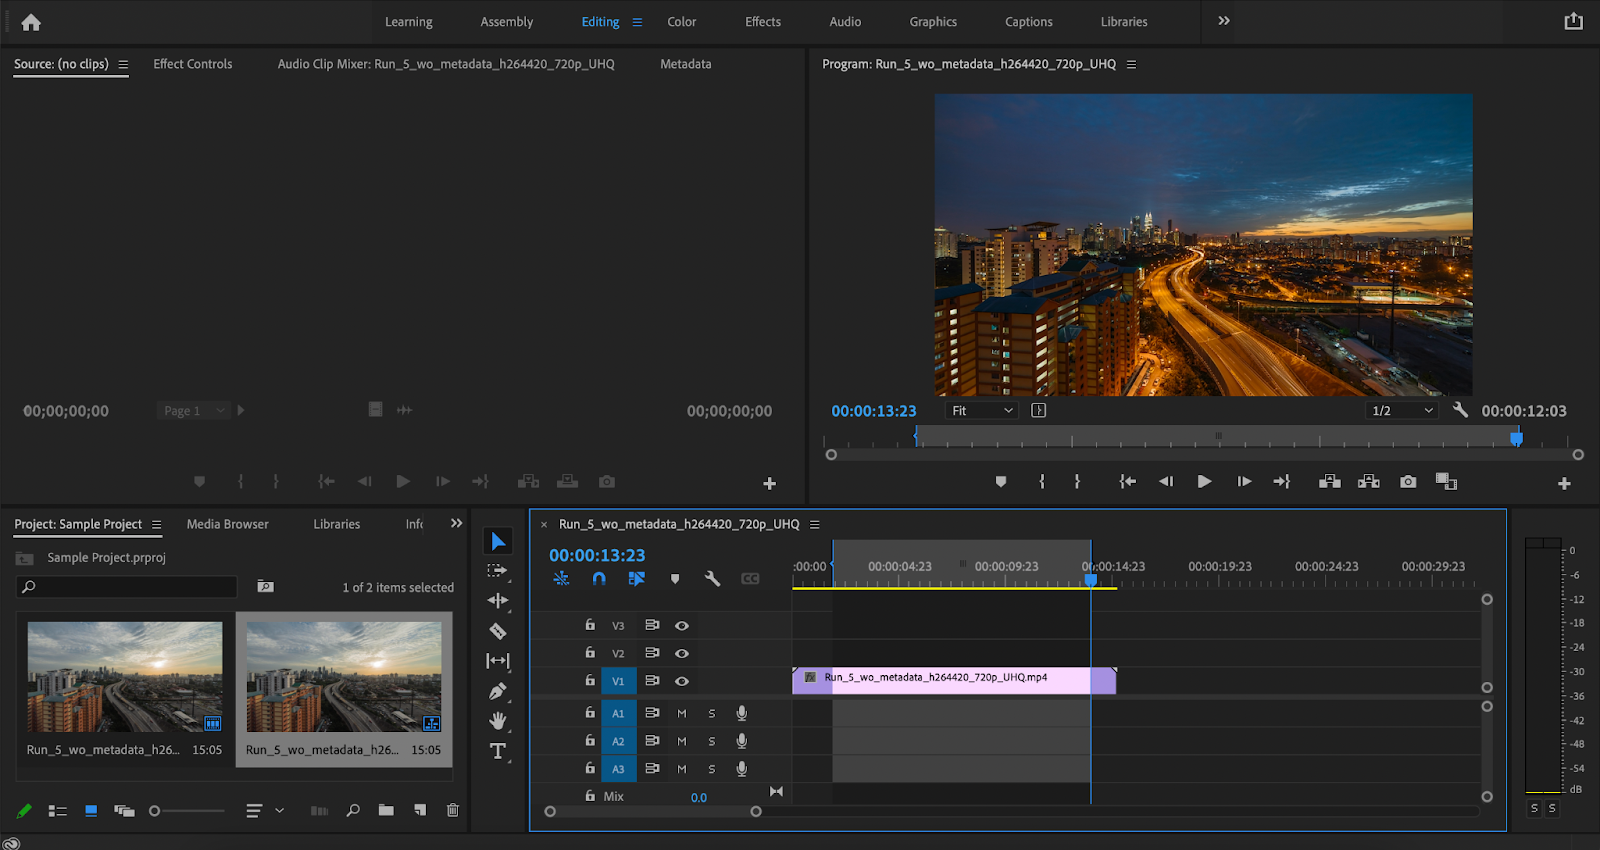
How to Render and Export Video from Premiere for YouTube
1. Set In/Out Points
The first thing you need to do is set in and out points for your video. Forgetting to do this is a simple mistake that can cost you lots of time. Move the playhead to the exact point where you’d like the video to begin and press “I.” Then, do the same thing with the video’s endpoint, but press “O.” You’ll see a highlighted grey area that confirms your video’s in and out points.
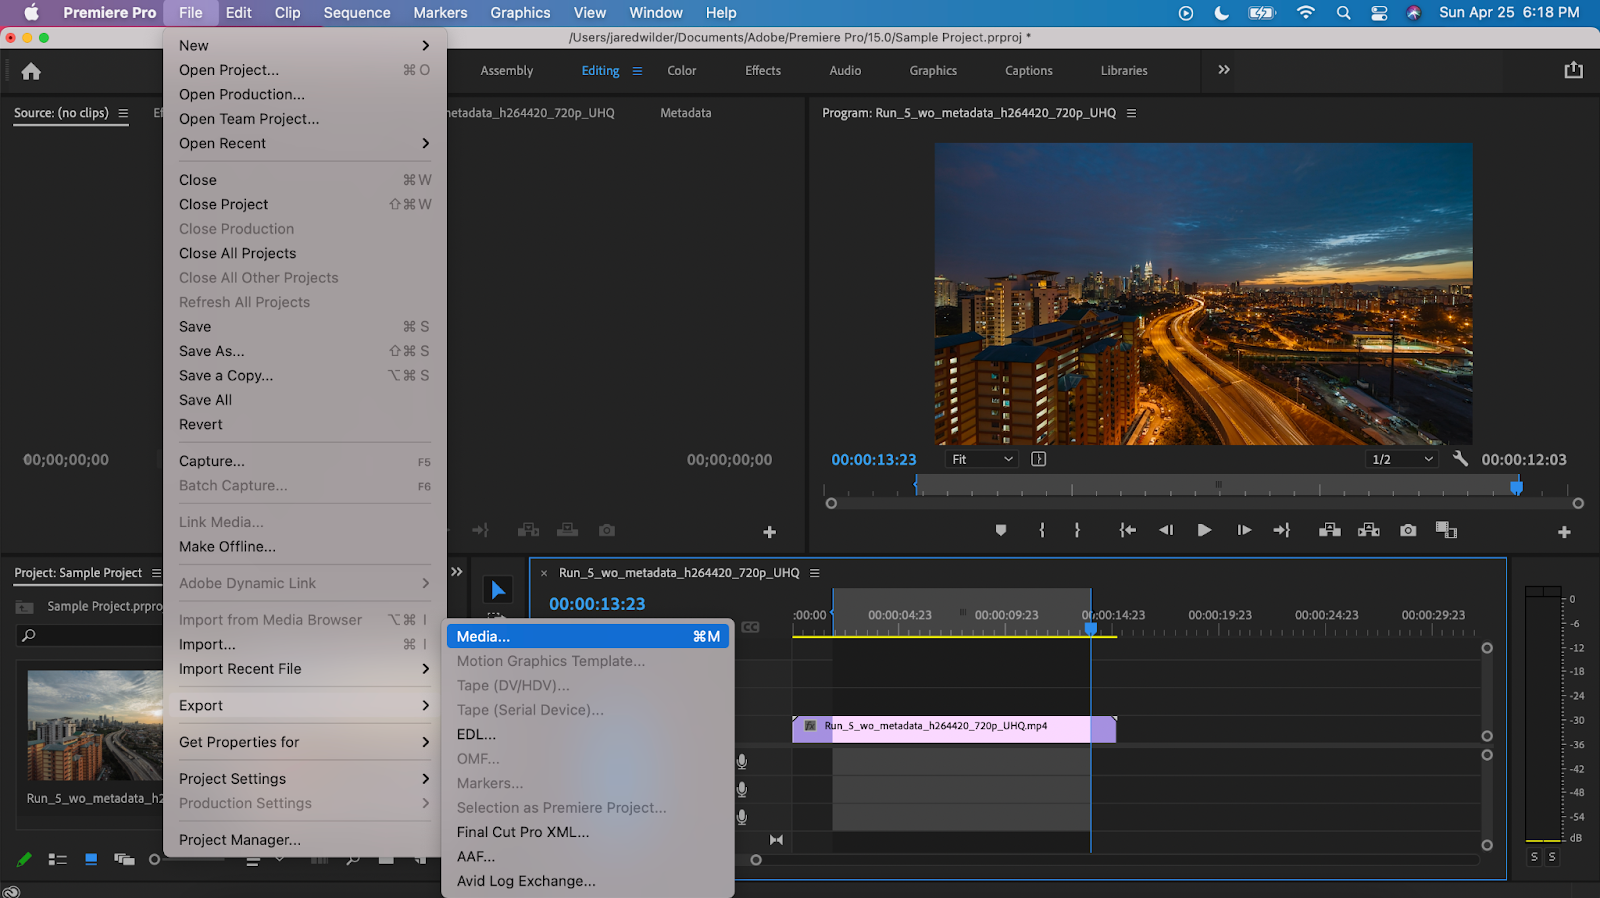
2. Head to the Premiere Pro CC Export Menu
Now, navigate to the Export Menu. Press “File,” scroll down to “Export,” and click “Media” to open the export menu. You can also use the “Command + M” (Mac) or “Control + M” (PC) shortcut to open the menu.
3. Choose a Format, and Name Your File
H.264 is the best format to export from Premiere Pro for YouTube. Select it from the list of options in the “Format” bar. Next, click on the “Output Name” and give your file a name that you’ll remember.

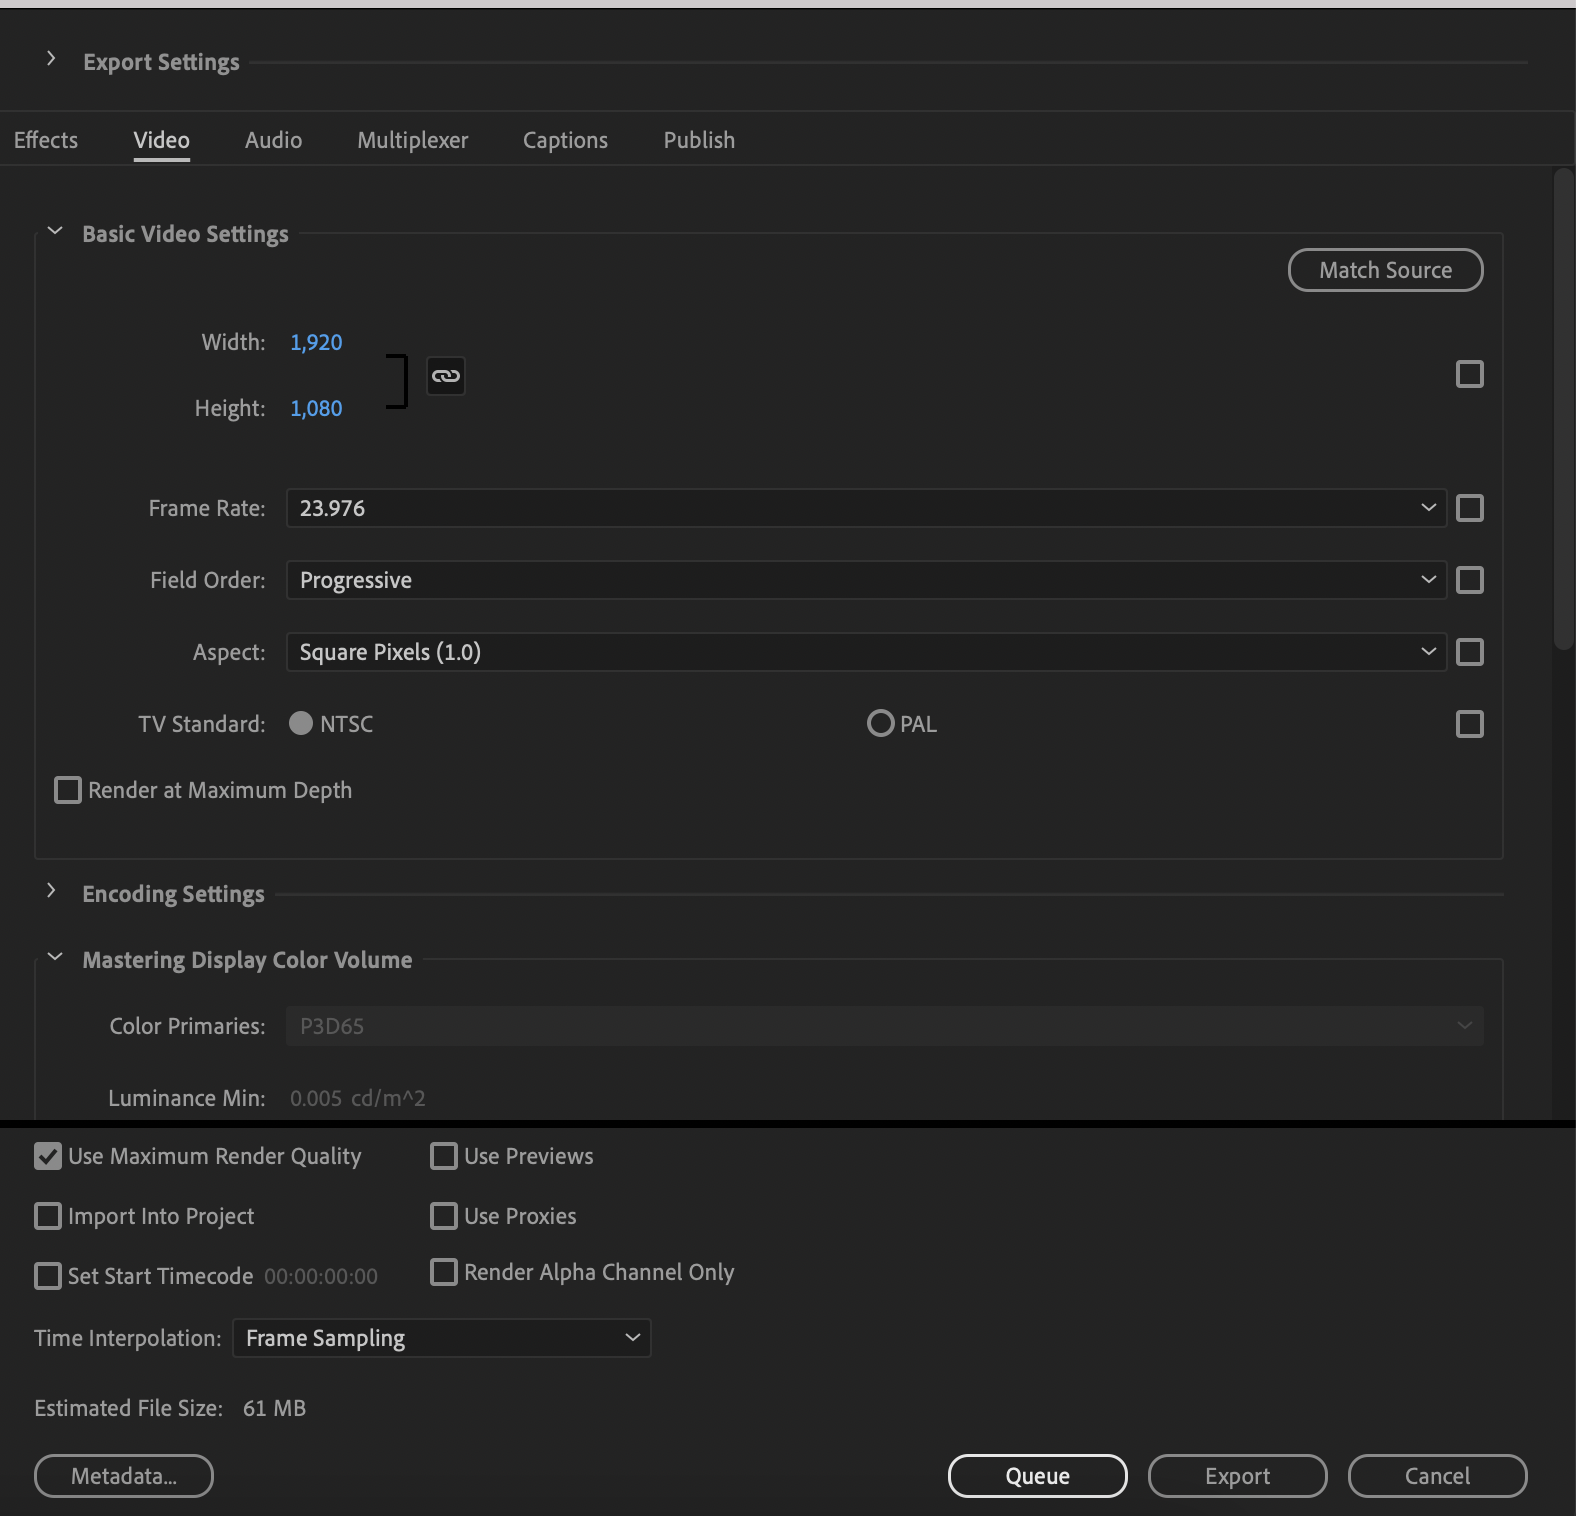
4. Configure "Basic Video Settings"
Resolution
Choose a resolution that matches the resolution of the video you shot. The majority of the time, this will be 1920 X 1080, the resolution for HD video. If you shot in 4K, select 3840 X 2160. You can also check the box that says “Match Source” and Premiere will choose the resolution for you.
Frame Rate
If you shot the video at a higher frame rate, you might need to adjust to 30FPS, 60FPS, or another frame rate that fits the frame rate you shot in. Premiere will automatically have “23.976” selected; unless you need to change it, you can leave that alone.
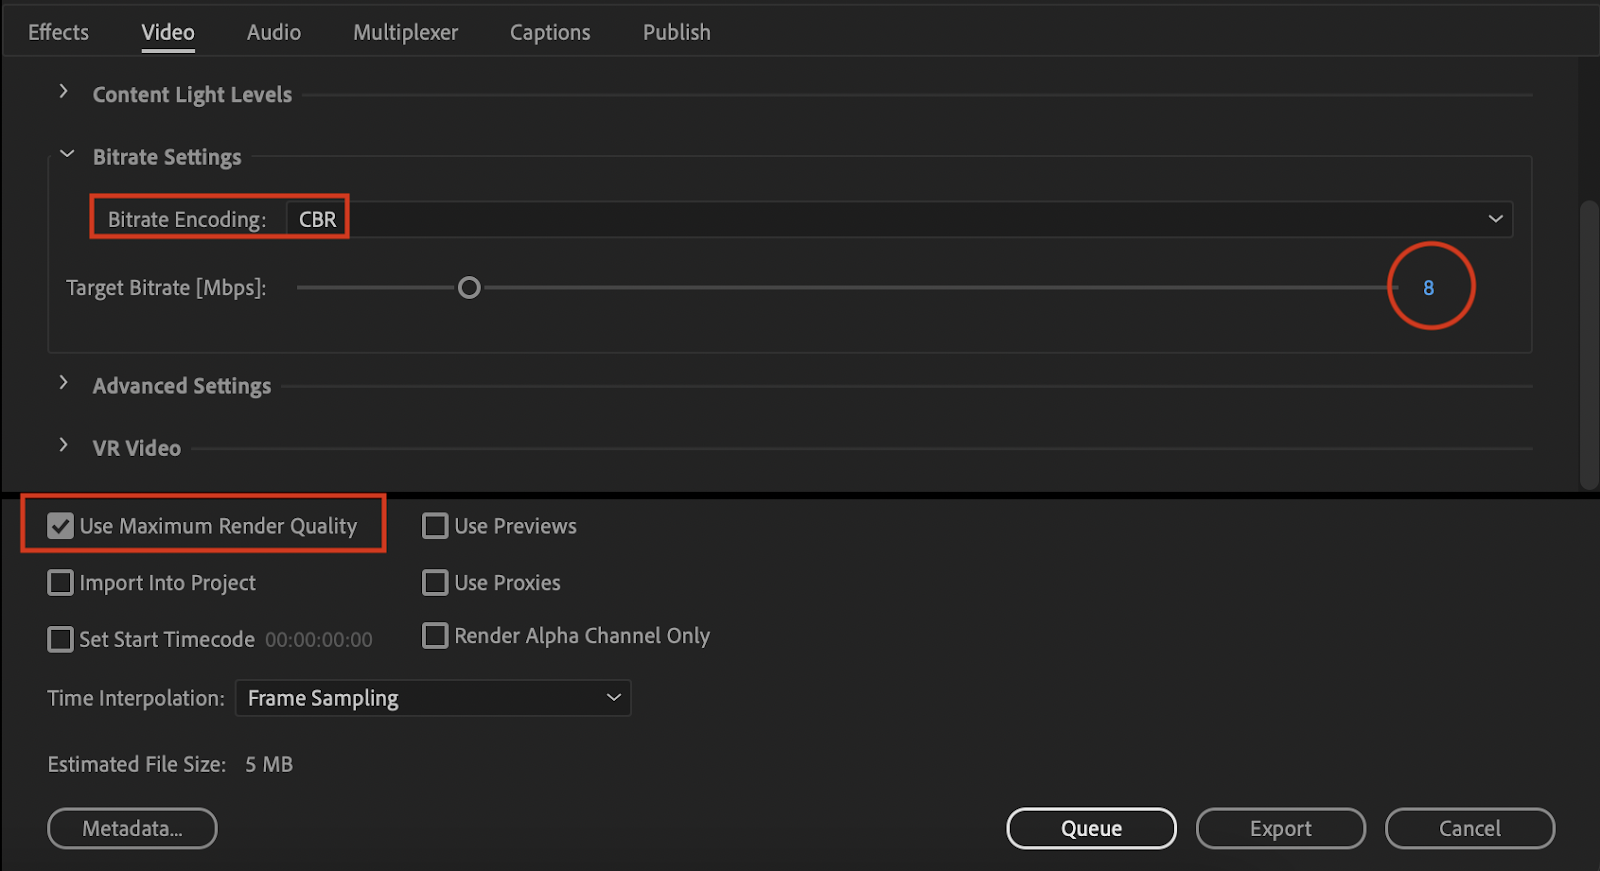
5. Configure "Bitrate Settings"
- Bitrate Encoding: Select “CBR”, Constant Bit Rate
- Target Bitrate: Click on the number next to the slider and type in “8” (or “45” if you’re exporting in 4K). If exporting at 1080P, 60FPS, choose 12 for target bitrate.
- Always Check "Use Maximum Render Quality": This will ensure that the video you export is of the highest possible quality, with the least compression.
6. Audio Export Settings in Premiere Pro
We didn’t spend much time on this because Premiere’s default settings work perfectly with YouTube. Click “Audio” in the menu bar and make sure that you see these numbers/selections:
- Audio Codec: AAC
- Sample Rate: 48000 Hz
- Channels: Stereo
- Audio Quality: High
- Bitrate: 256
- Precedence: Bitrate
If you see different settings on your screen, it’s likely that Premiere has automatically matched it to the source audio. However, this is a pretty rare occurrence and it’s easy to switch the audio settings to the above, which is best for YouTube.
7. Save Your Export Settings for Next Time
Before you press “Export,” scroll back to the top of the export settings menu. There is a button next to the “Presets” bar that will let you save your settings. Save it with a name like “YouTube Standard.” Then, all you have to do next time you export a video is choose that preset!

8. Export and Upload Your Video
Your export work is done! Press “export” and let Premiere work its magic! When the export is finished, the file will be saved on your computer’s hard drive, ready for YouTube uploading.
How to Upload a Video to YouTube from Premiere Pro
After exporting your video from Premiere, head over to YouTube.
- Click the camera gear icon in the top right (Create) and select Upload Video
- Drag your video file or locate it on your computer
- Follow the remaining steps to upload and optimize your video’s metadata
- Click Publish
Final Thoughts
Choosing the correct export settings for YouTube in Premiere Pro CC is crucial in the video production process. If you understand the basic terms and concepts, you can avoid time-wasting mistakes and focus on growing your audience and client/customer base!
Do you have any questions for us about Premiere Pro? Or, are you interested in taking a “hands-off” approach and letting us handle your business YouTube videos? Leave your comments below, and don’t hesitate to get in touch with us today!